Hi all! Here is a fun and informative tutorial I created for this
UPCYCLED CANVAS TOTE, while being
Artist In Residence on the Frenchkissed Blog for the month of August. A
Vintage Postcard from
Frenchkissed was used as the focal piece for the project. You can check out her full line of postcard downloads on her zibbet page, info at the end of this post! Also, if you'd like to purchase a plain tote for your own project, they are for sale on my ETSY shop...
http://www.etsy.com/shop/originalcyn01.
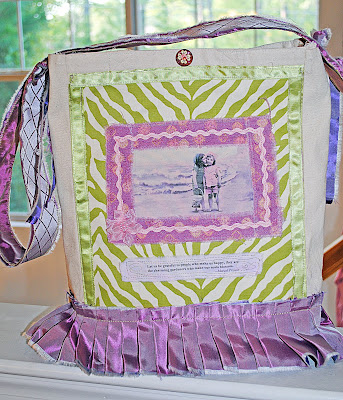
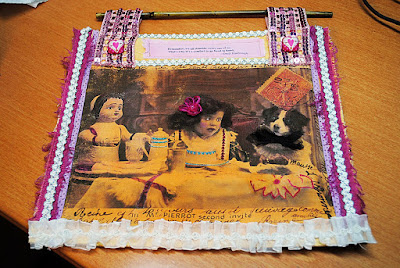
Here is a photo of the finished project. Pretty cool, huh?!
First, a little history: Way back when, I ordered about a hundred of these plain canvas bags with the idea of simply putting my artwork on them with iron-on transfers, much like you would a T-shirt. However, when I received the bags, I wasn't really happy with them. Returning wasn't a good option because of shipping costs, so I kept them for the day I would have another idea and they could be put to good use. Flash forward a year or two ...(sometimes these things take a while), and I started to form an interest in sewing. Now, this isn't 'standard' sewing I'm talking about here. It's more of a little messy, free-motion stitching kind of sewing -- thread painting, if you will. This form of sewing seemed like something I could really do, more free and easy, not so precise and pristine!
Further, the more I got into sewing, the more magazines and things I picked up ... and the more ideas I got! Voila! The idea for
upcycled, free motion stitched handbags. (Upcycled: the process of converting waste materials or useless products into new materials or products of better quality or a higher environmental value.)
Another term you will need to be familiar with in this tutorial is free-motion stitching.
Free-motion stitching makes use of a darning foot for your sewing machine, and then you must put your feed dogs down. This will allow you to move the fabric in whatever direction desired to achieve a quilted look in some places, while 'drawing' with the thread in other areas.
So let's begin.
I started with the plain bag.
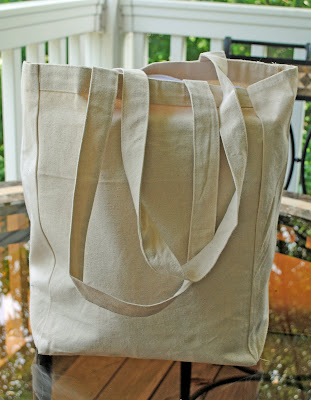
If you don't have a bag like this, don't worry. You can easily take two pieces of canvas or other sturdy material and cut into roughly 14x14-inch squares. If you do have a bag you'd like to use, cut down either side and through the middle of the bottom. Now you have one single side that will be the front of the bag. We will start adding our fabrics to this side.
1. Choose your fabrics!
Sew much fun!

2. For this bag, the first piece I had to cut and stitch on was the green and cream zebra print fabric. I cut a square for the bag front and sewed it into place. Then, I added the green ribbon trim to the sides and top. I often like to use contrasting thread colors when sewing on items such as the ribbon.
3. Now, in order to make the ruffle along the bottom, I took the frayed, straight edge of my plain purple material, measured about 3 1/2-inches in width, and cut into the fabric there. I then ripped it the rest of the way for that nice frayed edge I like. So, this left me with a strip of plain purple fabric that was 3 1/2-inches wide, and enough inches in length to ruffle it across the front bottom of the bag. I then pinned and sewed this into place.
Note: I sew the ruffle ALL THE WAY across my front piece so that it goes half way around the side of the bag.

4. Now I can make the focal piece for the middle front of the bag using my
FrenchKissed scan. Place "sew-in computer fabric" in the printer paper tray (
You can find this at JoAnn's Fabric), and color copy the postcard scan onto the fabric. Once printed, parchment paper is placed over the top and ironed to stabilize the color in the printed fabric. Cut or rip the picture piece out and sew onto the middle of the bag, leaving a little more room at the bottom than on the top.
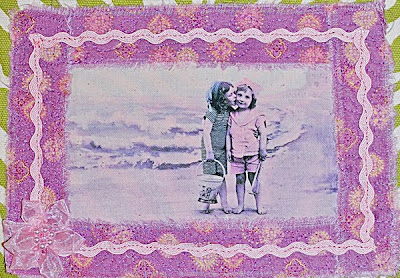
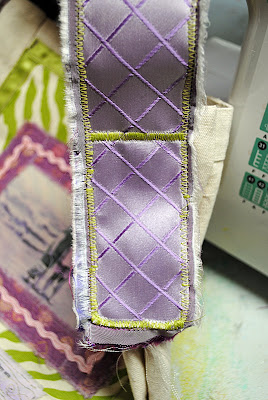
5. To frame the photo, I used the purple printed fabric. After initially sewing it on, I then went back and quilted over it using free motion stitching in a random pattern. The cute, wavy pink trim was then sewn on top, and the flower embellishment added as well with a few stitches from the sewing machine.
6. OK, so once I got to this point, I decided the cute little girlies could use a caption below their photo. I got on the computer and looked up "friend quotes." I then coppied and pasted them onto one sheet of paper in my writing program (Microsoft Works Word Processor). The quotes were all printed out on a single sheet of fabric paper just as was done with the post card above. After ironing them, I ripped out the one I wanted for this project, dyed the fabric with a wash of lavender acrylic paint, and then free-motion stitched the quote onto the bag.
Let us be grateful to people who make us happy, they are the charming gardeners who make our souls blossom. - Marcel Proust

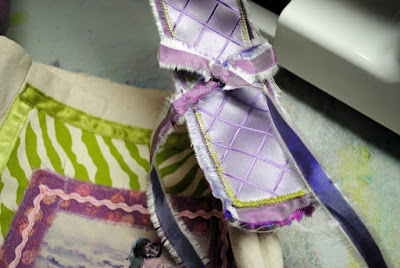
7. Next, wrong sides facing outward, the bag was then sewn back together and turned right side out. I decided which fabric I wanted to use for a strap, and found some fat, textured ribbon in a closely matching color that could be added to the strap as well. I sewed two pieces of the plain purple material together with the additional ribbon affixed to one of the sides. I did this with a zig-zag stitch using green thread, the color of the zebra print.
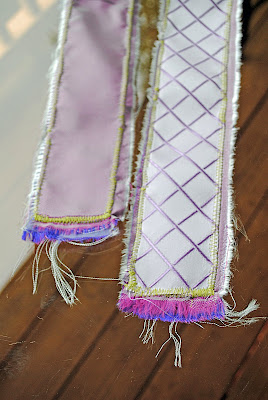
I ripped out the pieces to my desired length and width. (Just play with it a bit, and pin in place to see how you like it before committing to sewing it on!)
The strap was sewn on and bows added to each side. A final touch included a velcro closure in the top middle of the bag to keep it from gaping open.
And so then we are left with the final product!
 If you have any questions, ask away in the comments and I'll reply as soon as I can!
If you like what you see and would like to see more, please visit me here at my blog for more tutorials and at my ETSY site for all kinds of yummy gifts!
Hope you enjoyed the tutorial. Take care and happy creating!
Cynthia E. Anderson
Original Cyn Design
http://originalcyndesign.blogspot.com/
http://www.etsy.com/shop/originalcyn01
Vintage French Postcard Downloads and more:
Trishia Jacobs


 1. I took a sheet of TAP (transfer artist's paper) and printed the image onto it. I wanted the postcard to appear just as it did on the computer, so I first took it into my Photoshop program and 'flipped it horizontal' to keep the text reading in the right direction. After printing, I then adhered it to muslin by iron-on transfer. Mine here is about 8.5 by 10 inches. For some reason, this one came out a little purple-ish from my printer, so I antiqued it with a wash of Nickel Azo Gold (Golden's paints.) Next, I cut brown felt and batting to the same size as my muslin. I left 2 extra inches at the top to play with.
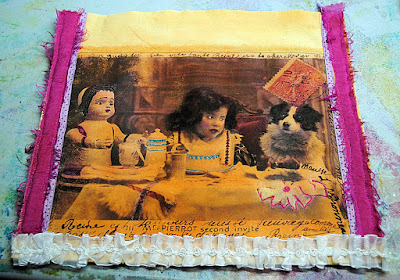
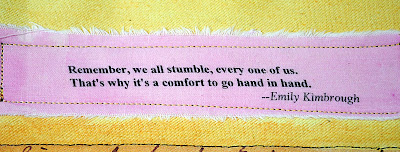
 4. I thread-painted a few things into the photo such as, the trim to the tea pot, giant tea cup, top of doll's head and the flower doily on the table. I then found some ribbons that I used to frame the piece. After sewing the initial ribbons in place (as in previous photo) I found a quote that I thought fitting for this particular photo, printed it out on printer fabric paper, color washed it with pink acrylic and sewed it to the top. I then found the white and silver ribbon and added that around the borders.
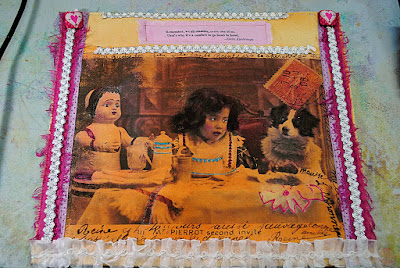
 5. I bunched up some cut black sheer ribbon and made a little bow tie for the dog, which I machine sewed into place. Next, I added a pink flower to the little girl's hair, by hand sewing it on. I had an old piece of fabric with sequins that used to be something to wrap around one's neck. Since I never use it anymore, it looked perfect to repurpose for this project. Strips were cut at the same length and sewn into place.
 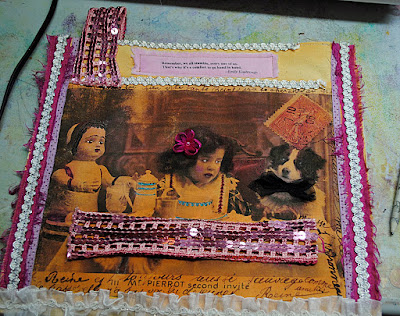 6. Lastly, I punched a hole in the fabric sandwich on either side of the top so I could add fabric buttons with metal brad attachments on their backs. A bamboo stick was added through the top loops and voila: another adorable fabric creation!!!